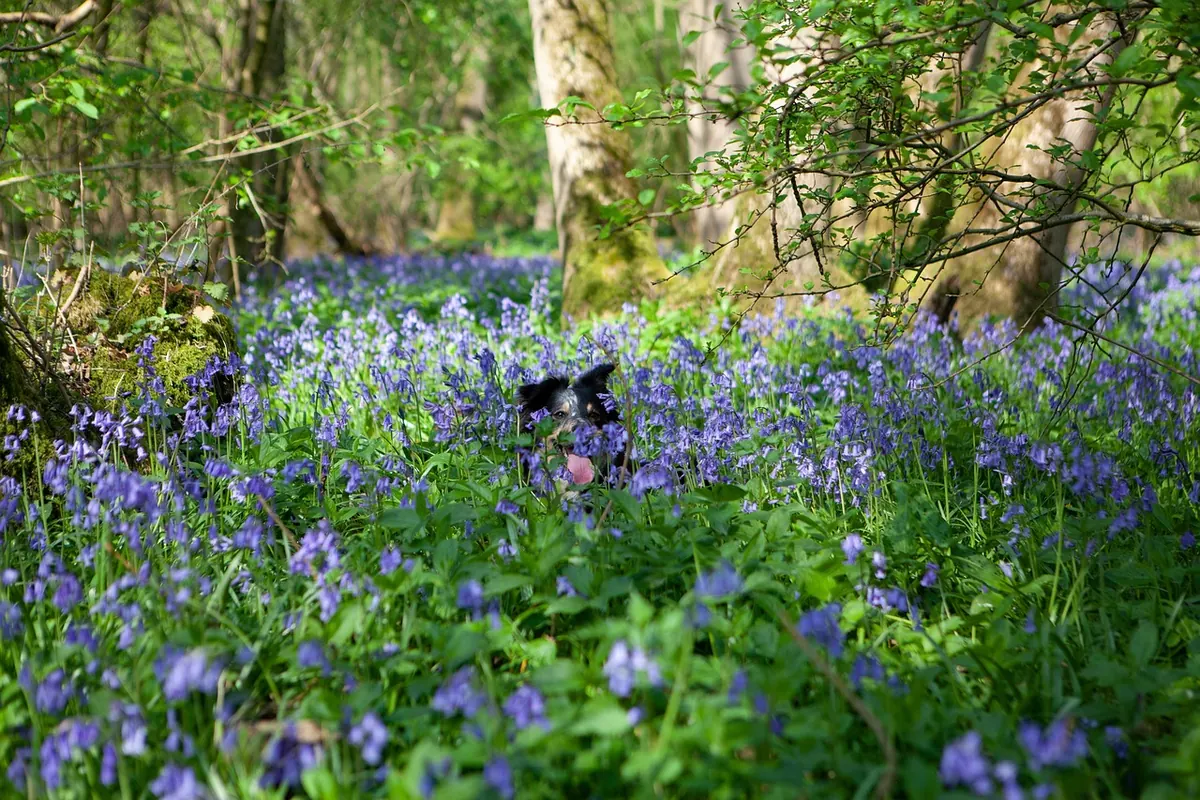
Bluebell woods run on a short clock. In the south and west the first hazy blue can appear by mid-April, while upland and northern woods may hold out until late May. Meadows keep their own calendar, moving from cowslips to buttercups across a few weeks. Get the timing, the light, the focus and the fieldcraft right and you will come home with pictures worth keeping.
Bluebells do not all open on the same day, so treat the season as a fortnight you watch rather than a single trip you book. Early on, when the first spikes open, the floor reads as scattered violet against brown leaf litter. Then comes the flush: the whole wood turns a soft blue-violet and the air smells faintly of hyacinth. After that the colour drains towards grey-blue and the stems stretch, which is still worth photographing but far less intense.
Learn the difference between our native bluebell and the Spanish garden escape. Native flowers hang to one side of the stem, are deep violet-blue with cream-coloured anthers and carry a sweet scent. Spanish ones stand more upright, look paler, smell of nothing much and have blue anthers. Photograph the natives where you can, and if you are unsure, your nose is the quickest test.
Spring meadows are a sequence, not a single event. Cowslips and early purple orchids come first, followed by buttercups, oxeye daisies and yellow rattle. Many hay meadows are cut in early summer, so the gap between first flower and mower can be only a few weeks. Check the site's own updates, visit a fortnight before you expect peak, and go back when it looks right.
Woodland is a low-light environment, and bluebells sit in shade for much of the day. Bright overcast is the friendliest condition: soft, even light, saturated blues and no blown highlights. Sun is harder work. Direct light through a beech canopy gives pools of brightness and deep shadow, and that contrast can swallow detail. Use it deliberately. Backlight a single stem to show the translucent bell, or shade the brightest bloom with your hand or a small flag.
Wind matters more than rain. A still morning after overnight rain is close to perfect: droplets on the bells and nothing moving. Wind makes focus stacking impossible and blurs petals even at fast shutter speeds. In meadows, avoid harsh midday light and work early, late or under cloud.
At close range, depth of field collapses. Photograph a bluebell head at 1:1 and even f/16 may give you only a few millimetres of sharpness — rarely enough for a flower that leans towards you.
You have two sensible options. The first is a single frame at a small aperture, composed so the important parts sit on one plane: keep the subject parallel to the sensor and accept that the far petals soften. The second is to stack.
A two-second delay or an electronic shutter cuts vibration. Flash can rescue a breezy day, but diffuse it well or the highlights will look harsh against soft woodland colour.
Bluebells grow slowly. A colony can take years to establish, and a crushed plant may not flower the following spring. The rules are simple and worth keeping.
A bluebell that has been knelt on is gone for years. The picture is worth nothing if the wood pays for it.
For the wide shot, get low. A wide lens a hand's width above the litter turns a patch of blue into an ocean, especially on a slope where the flowers recede uphill. Look for structure: a fallen trunk, a curving path, a shaft of light, a single birch trunk in a sea of violet. Compose so something anchors the frame instead of filling it with even texture.
For close work, get level with the flower. A clean background — deep shadow, moss, one distant out-of-focus bloom — does more than any amount of sharpness. Backlight rewards patience. Take a record frame, then one deliberate frame you have actually thought about. Five considered images from a morning beat two hundred near-identical ones.
A practical packing guide for nature photographers heading into the British outdoors, covering cameras, lenses, rain...
How to find, time and photograph Lake District fog — accessible viewpoints from Buttermere to Tarn Hows, exposure...
How to expose for snow and frost, protect your kit in the cold, and find strong compositions when winter light lasts...

Exploring misty landscapes and quiet natural places.
